

How to make a Homemade Cornucopia


To start the cornucopia you first need to create your mold so depending on the size of your cornucopia you want to use a regular sized water bottle (for a 10-12" Cornucopia) or an extra large water bottle (for a 16-18") Cornucopia. If you have crafting paper this is even better. Make a paper cone and use that as your mold. Lay out a sheet of foil and start wrapping your water bottle or paper cone at an angle.

You are trying to create a giant foil cone.
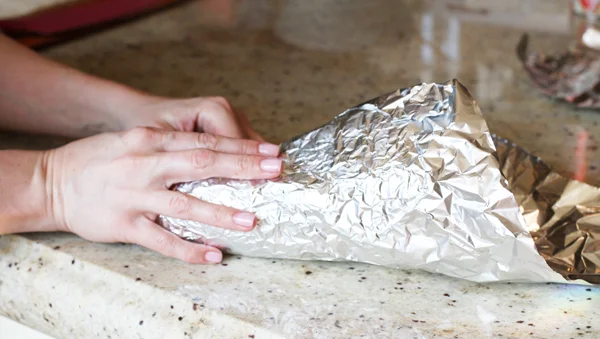
Make sure to smooth out your foil.
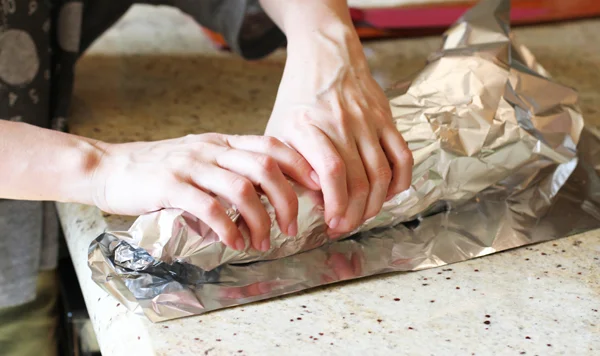
You are going to continue adding layers until you have a thick cone. Remember, the dough is going to be resting on this foil cone (and you will be removing the water bottle) so you don't want it to collapse. It needs to be strong enough to hold it's shape. I recommend four layers and keep layering the pieces off the end of the cone so your shape gets longer and longer.

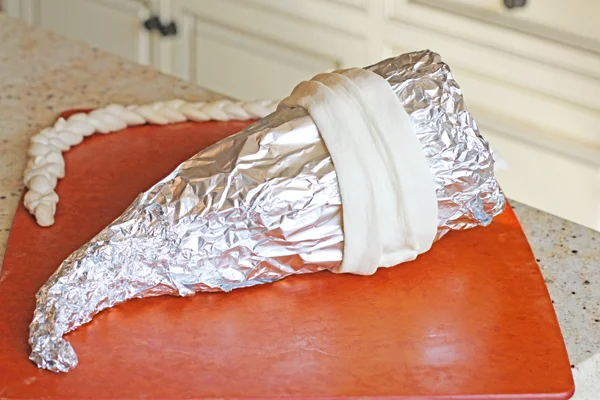
Fold over the ends of the foil so the edge is extra thick. This is going to be the heaviest portion of the cornucopia. Once you have it all folded, stretch out the edges of the foil by pulling it up with your hands so you have a wide opening.
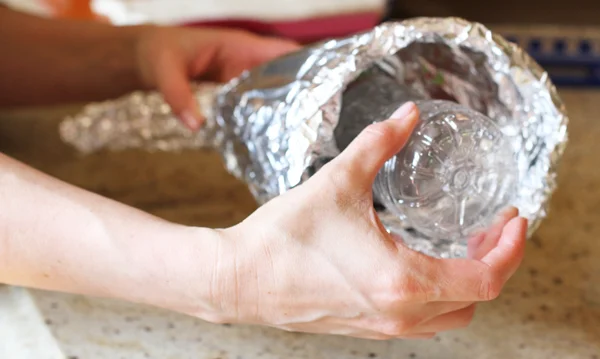
Now remove the water bottle and stretch out the center so you have a wide opening. If you feel your mold still isn't strong enough you can stuff the center with foil. DO NOT leave the water bottle inside the mold. Also, now is the time to bend the end of the "tail" - Traditional cornucopias curve at the end. Just use your hands to mold the foil. Now set aside and grab your dough.
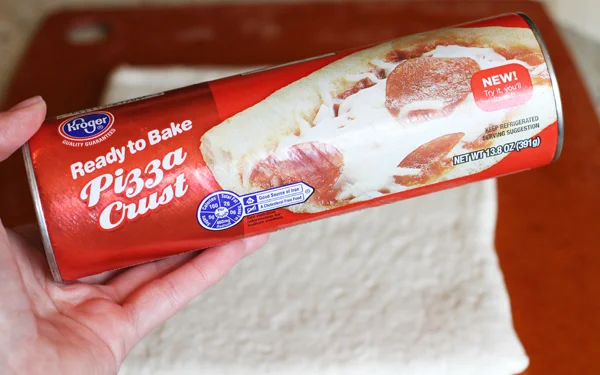
You can make any basic bread dough for this or you can use store bought dough. If you are using store bought dough stay away from biscuit dough and crescent rolls. It's too flaky and your cornucopia will break. The pizza dough and the French bread dough works best for this. You will need 3 (14oz) cans for the small cornucopia and 5 cans for the larger version.
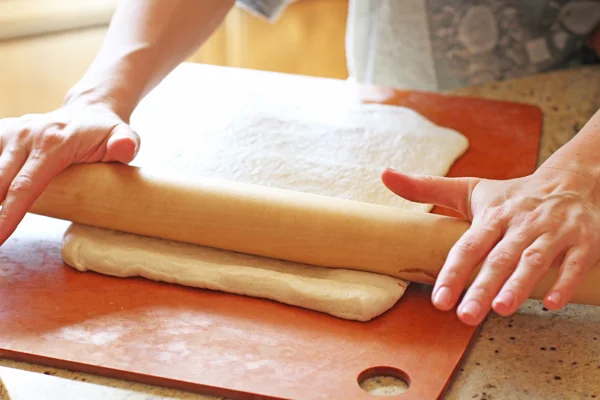
Using a rolling pin gently roll out your dough so it's a little thinner.

Roll in the opposite direction as well until you have a thin rectangle. About a half inch thick.
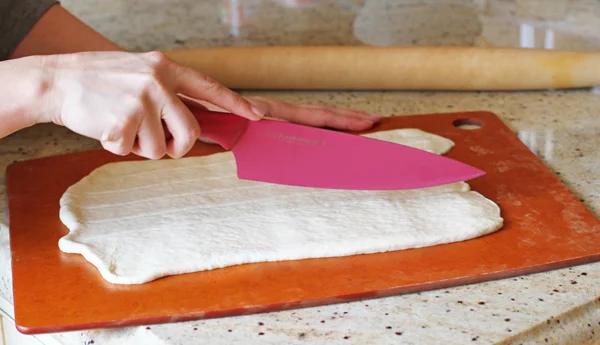
Now cut your dough into one inch strips.
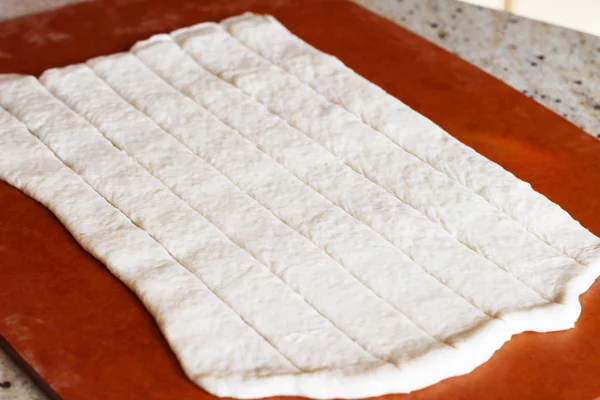
Perfect!
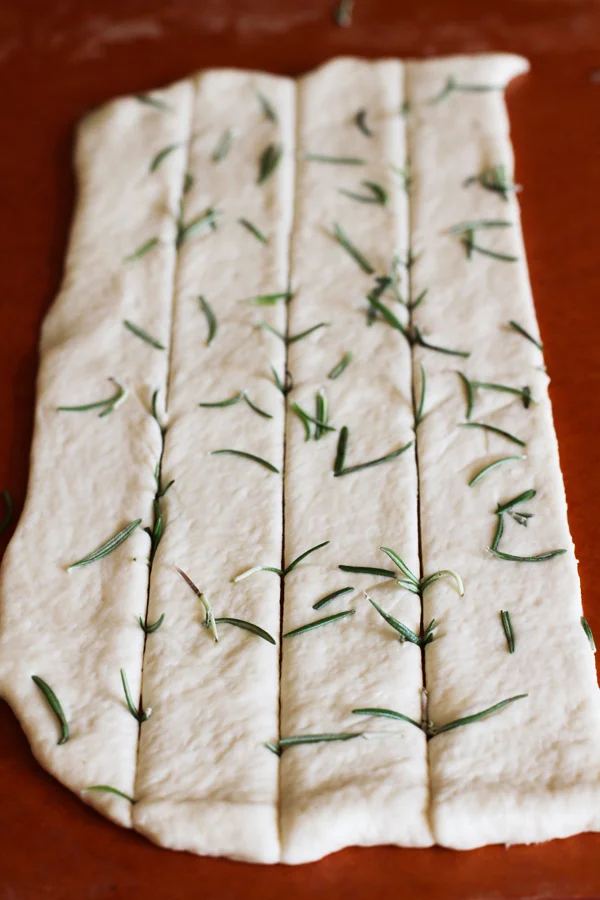
This is my rosemary version. If you want to add herbs to your dough sprinkle the herbs on and then go ahead and roll the dough with your rolling pin every so slightly so they all press into the dough. They still tend to pop up a bit, but it wont matter once you cook it.

Now here is where you can get creative! Start by spraying your foil with non-stick cooking spray. All around the foil - especially near the tail portion because this is where it can get stuck once it's baked. Now for the dough. If you want a simple flat look (like my rosemary cornucopia) just layer your pieces one by one so they are slightly overlapping. This dough does not expand much so you want to make sure there are no gaps between the pieces. Start about 1 inch from the end so you can pull the foil out once it is baked. Also in this picture I will be adding a braided strip at the very front.
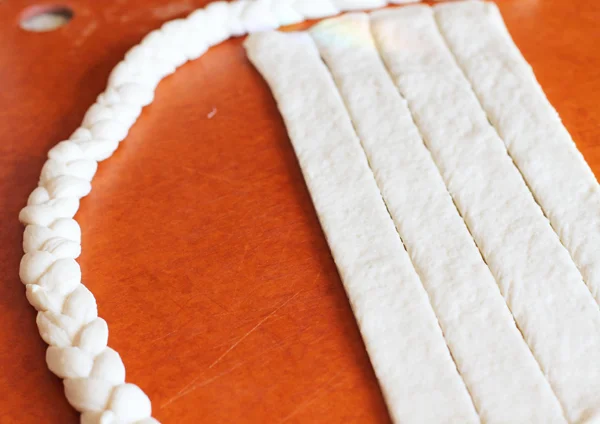
Keep wrapping the strips of dough until you completely cover the foil. And always remember to leave an inch of space at the top because it's easier to remove the foil once the bread is baked. Also a quick tip for all you perfectionists, try to cut your dough strips so all the seams meet at the bottom of the foil. This way, the ugliest part isn't seen : )
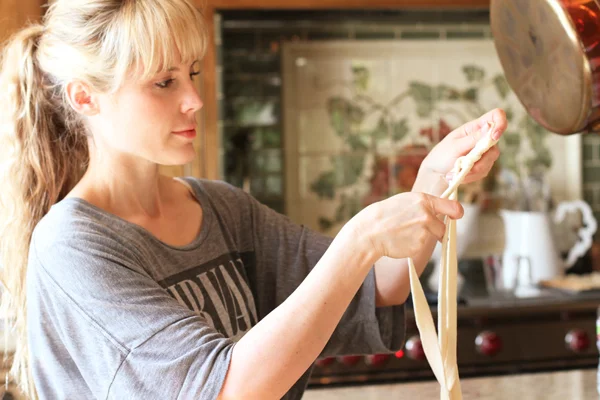
Now for the braided part of the cornucopia you need to use three strips of dough and literally braid them together. If you don't have someone to hold the end of your braid it's best to braid the dough while holding it up in the air with one hand. Just pinch the ends of the braid together so they don't unravel. It doesn't need to be super tight.
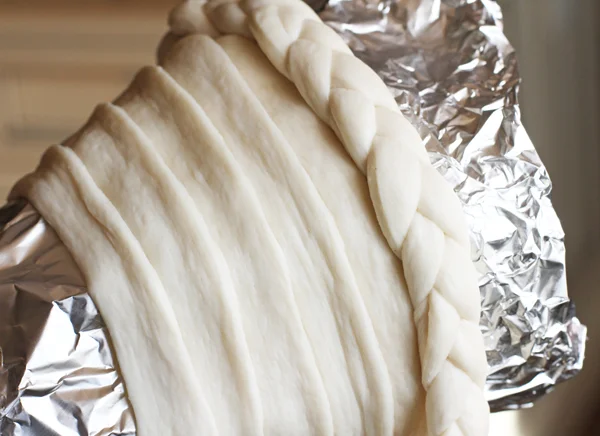
Now just wrap the braid around the top portion so it's your finished edge.
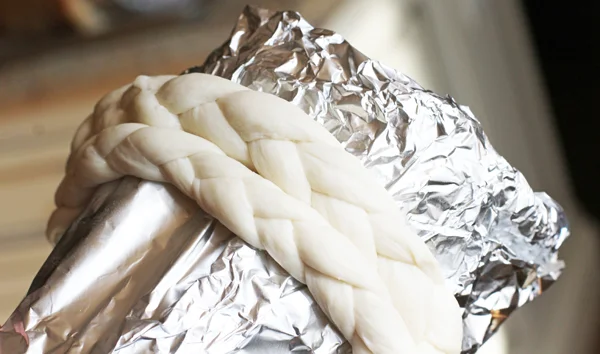
If you want to make a completely braided version of this like I showed at the beginning of the post just continue braiding your pieces all the way down your mold.
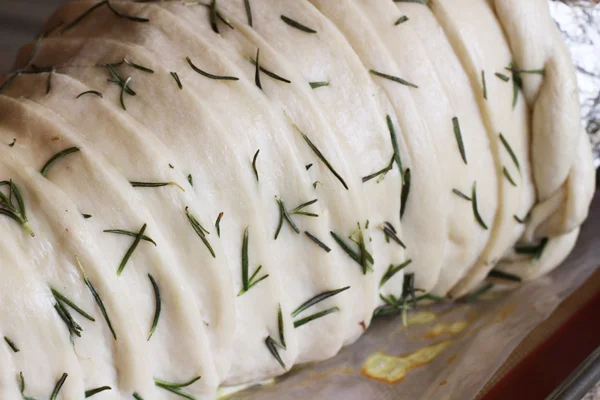
Here is the herb version with the flat pieces and the braided top.
Ok this is ready to go. Preheat your oven to 350 degrees and while it's heating beat one egg with 1 tsp of water in a small bowl. Brush your dough with the egg wash so it gets a shiny golden color when it bakes. Now this has to go into the oven at 350 degrees for 20-35 minutes. Put all your racks down to the bottom so the cornucopia has plenty of room to cook. I know this is a big time frame but it depends on how large you made your cornucopia. The bread should be golden brown when you take it out of the oven.
TIP: If the highest part of your cornucopia starts getting too brown just place a thin piece of foil over only that section.
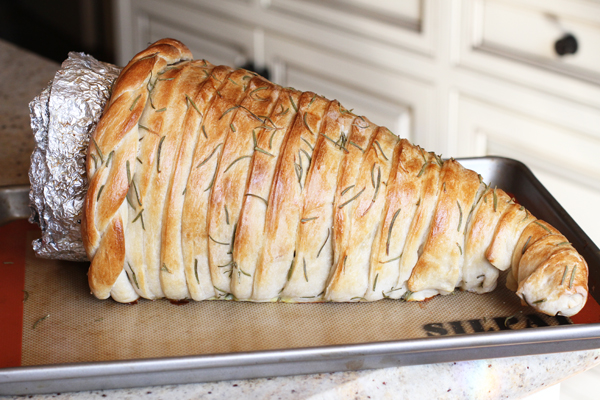
Let the bread cool a bit before you try to remove the foil. Be very gentle with it!

Be patient and the foil will come out. I promise! The center of the cornucopia will be white. It's completely cooked it just doesn't turn golden brown.
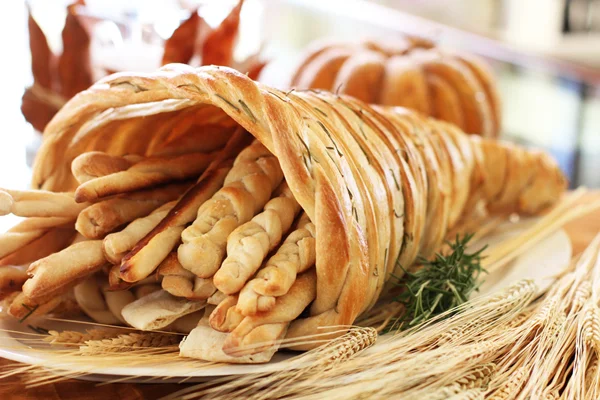
Now fill it with whatever you want! I filled it with handmade bread sticks made from the left-over dough.

I think this one is my favorite. It's so beautiful.
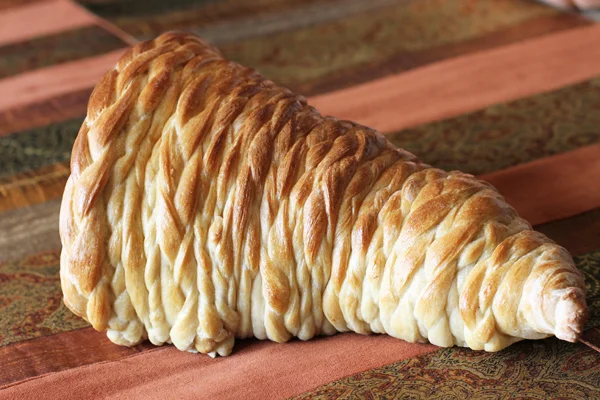
This is the braided version. Each strip was braided and then wrapped. There were no flat pieces.
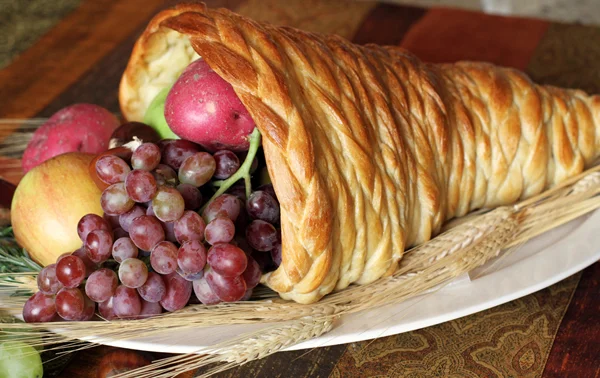
Classy Cornucopia.

I filled this one with more traditional items like fruits and nuts.
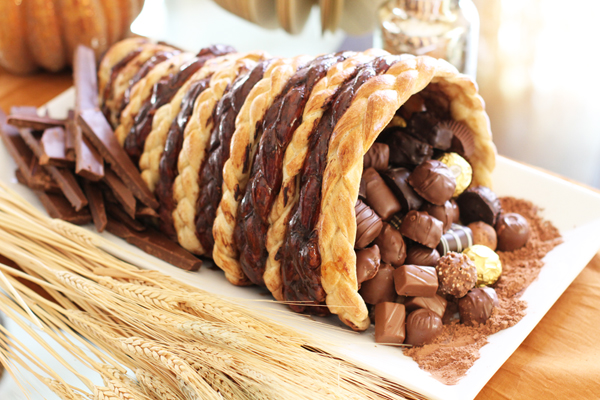
And without further adieu .....
The hand painted (and edible) ......

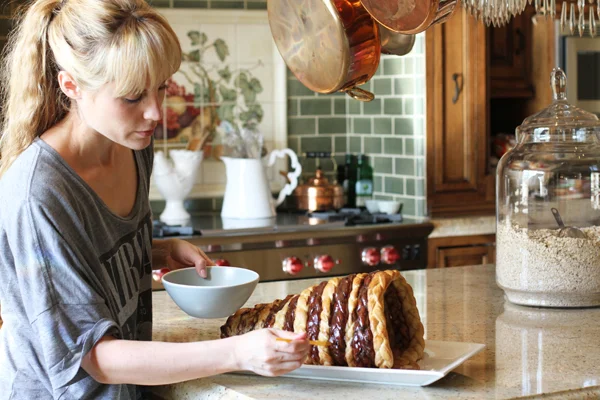
Chocolate Cornucopia! Pretty awesome, huh? Yeah, I think so too.
This one was fully braided and then once cooked we painted every other braid with our chocolate paint (2 tbs cocoa and 3 tablespoons of light corn syrup). Then fill with super yummy chocolates : )
Happy Thanksgiving!
This segment was featured HERE on the Home and Family show on the Hallmark Channel!