
Opens in a new tab

How to make a Peppermint Plate

by Jessie Daye

First published: December 17, 2013 | Updated: June 10, 2026

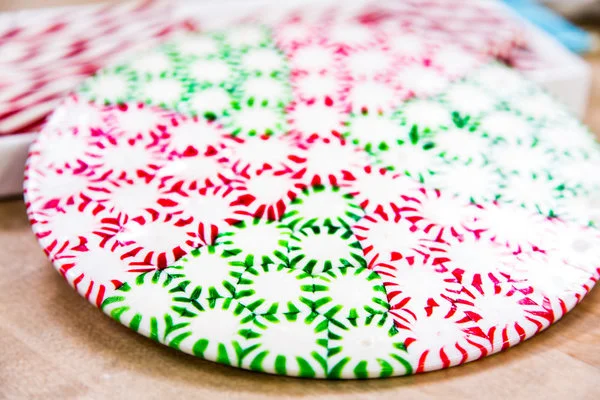
This is probably one of my favorite projects. It’s super fun and they come out glossy and perfect. My daughters and I have made these peppermint plates for years now. Let me tell you ….. Santa loves getting his cookies on a peppermint plate : )

Original blog post from 2014 below:

I made a dozen peppermint plates this week for Home and Family on the Hallmark Channel and I was thinking of using them as dessert plates at the Christmas table!

If you missed today’s episode of Home and Family on the Hallmark Channel weekdays 10am/9c you can scroll down and see the tutorial below!

898260.jpg
898244.jpg

Santa’s Peppermint Plate

Ingredients
Red and green starlite mints
Silicone baking molds: https://amzn.to/4htazHL

** Note: You could also use a baking sheet with parchment paper

Directions
1. Preheat oven to 350 degrees and unwrap all your mints. Place the mints inside the silicone round and keep them all relatively close together, making sure to fill out the entire round. Get creative and make a design.

2. Carefully place the silicone mold in the oven for 5-7 minutes until the mints are melted together. Be sure to watch carefully. You do not want the mints to start to bubble. 

3. Remove from oven and let cool on the counter for 10 minutes before removing from the silicone mold. 

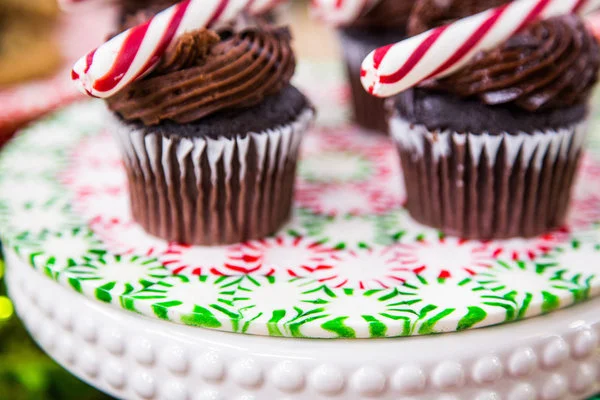
4. If you wish to make your peppermint tray a cake stand you can not glue candy canes to the base. Obviously do not eat if you choose to use hot glue. Use platter to hold santa’s cookies or to serve holiday treats! 

Tips: The plates will only get sticky if they come in contact with moisture otherwise they remain glossy and perfect. Do not refrigerate or freeze.


photo_13.jpg_crop_display.jpg

Santa's Peppermint Plate

Author: Jessie Daye
No ratings yet
Share
Print
Prep 10 minutes
Cook 6 minutes
Total 26 minutes
Homemade peppermint candy plates made by melting red and green mints in silicone molds for a glossy, decorative dessert plate.

Ingredients

  • Red and green starlite mints unwrapped
  • Silicone baking molds or baking sheet with parchment paper

Method

  1. Preheat oven to 350 degrees and unwrap all your mints. Place the mints inside the silicone round and keep them all relatively close together, making sure to fill out the entire round. Get creative and make a design.
  2. Carefully place the silicone mold in the oven for 5-7 minutes until the mints are melted together. Be sure to watch carefully. Do not want the mints to start to bubble.
  3. Remove from oven and let cool on the counter for 10 minutes before removing from the silicone mold.
  4. If you wish to make your peppermint tray a cake stand you can glue candy canes to the base (do not use if you choose to use hot glue and plan to eat). Use platter to hold santa's cookies or to serve holiday treats!

Notes

The plates will only get sticky if they come in contact with moisture otherwise they remain glossy and perfect. Do not refrigerate or freeze.

Tried this recipe?

Let us know how it was!

Leave the first comment

Recipe Rating


This post may contain affiliate links, please see our privacy policy for details.

Hi, I'm Jessie. 

I’m a Los Angeles mama, home renovator, and lifelong creative, sharing the things that make everyday life a little more beautiful. I believe food is one of the best ways to bring people together, which is why I love cooking: it turns an ordinary Tuesday into something worth remembering. From recipes I make on repeat to DIY projects, home design, and a little bit of real life in between — welcome to my corner of the internet. I’m so glad you’re here.

More about Jessie

Let’s be friends!

Be the first to receive exclusive content, hear about upcoming collaborations, and special events!

* indicates required

Intuit Mailchimp