Opens in a new tab

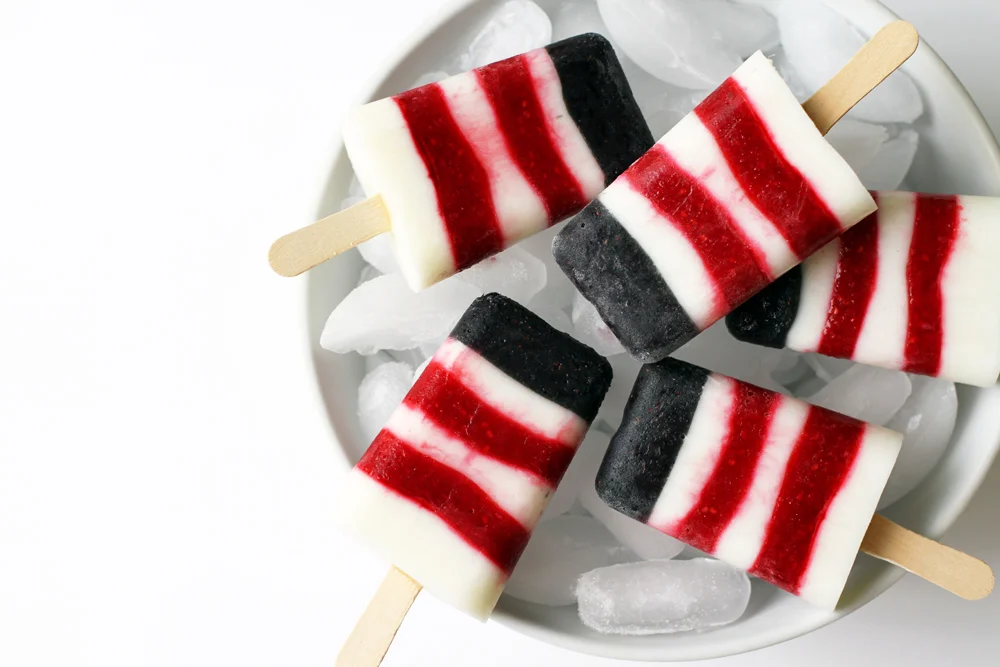
Fourth of July Fruit Popsicles

by Jessie Daye

First published: June 16, 2016 | Updated: June 10, 2026

It’s 100 degrees in LA today and these popsicles be like all over the place. Get your America on and make some of these for the 4th! Happy Friday! Xx 
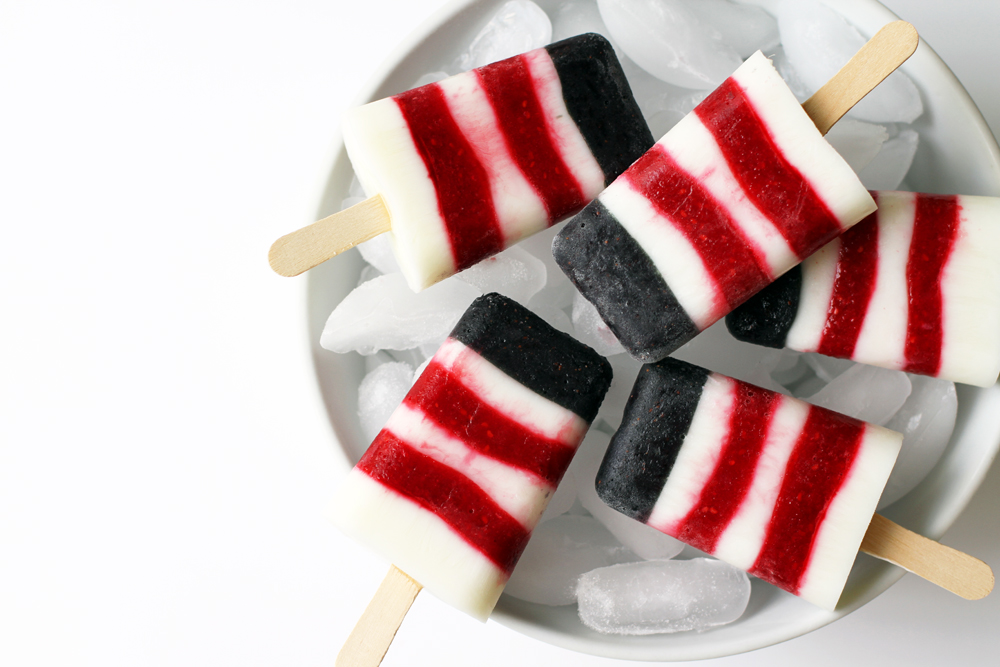
FourthofJulyPopsiclesLilyshop1.jpg

Fourth of July Fruit Puree Popsicles

Ingredients
1 heaping cup raspberries
1 cup blueberries
1 cup vanilla yogurt
Blue food coloring (optional)
Popsicle mold
Popsicle sticks

Directions
1. Puree the raspberries in a food processor or blender until smooth.

2. Repeat for the blueberries. If they are really purple you can add some blue food coloring.

3. Put the yogurt and the berry purees in small measuring cups with spouts. Thin with a little water if necessary to make them pour more easily. Our berries were very fresh and did not require any water to thin them out. Keep the cups chilling in the refrigerator when not using them.

4. To start layering the pops begin with a thin layer of the blueberry puree. The hardest part is not spilling down the sides of the mold as you pour! You can use a spare popsicle stick to scrap the sides down if needed. Freeze for an hour or so.

5. Next, add a thin layer of yogurt and freeze for at least an hour.

6. Then add a layer of raspberry puree. Cover the mold with foil and add your popsicle sticks. The foil will help keep the sticks standing upright. Poke them through the frozen layer a bit so they will stand up. Freeze for at least an hour.

7. Remove the foil and repeat the yogurt and raspberry layering until you reach to top of the mold. Remember to freeze each layer for at least an hour before adding the next layer.

8. Once completely filled, allow the pops to freeze solid.

9. To remove the popsicles from the mold fill a bowl (or your sink) with hot water. Immerse your mold just up to the lip being very careful not to splash water on your pops. Hold the mold in the water for 30-60 seconds until you can slide them out. 

TIP: Make a day or two in advance. Don’t remove from the mold until ready to serve – the fruits will thaw quickly on a hot day.

Fourth of July Fruit Puree Popsicles

Author: Jessie Daye
No ratings yet
Share
Print
Layered berry and yogurt popsicles with blueberries, raspberries, and vanilla yogurt.

Ingredients

  • 1 heaping cup raspberries
  • 1 cup blueberries
  • 1 cup vanilla yogurt
  • blue food coloring optional
  • popsicle mold
  • popsicle sticks

Method

  1. Puree the raspberries in a food processor or blender until smooth.
  2. Repeat for the blueberries. If they are really purple you can add some blue food coloring.
  3. Put the yogurt and the berry purees in small measuring cups with spouts. Thin with a little water if necessary to make them pour more easily. Our berries were very fresh and did not require any water to thin them out. Keep the cups chilling in the refrigerator when not using them.
  4. To start layering the pops begin with a thin layer of the blueberry puree. The hardest part is not spilling down the sides of the mold as you pour! You can use a spare popsicle stick to scrap the sides down if needed. Freeze for an hour or so.
  5. Next, add a thin layer of yogurt and freeze for at least an hour.
  6. Then add a layer of raspberry puree. Cover the mold with foil and add your popsicle sticks. The foil will help keep the sticks standing upright. Poke them through the frozen layer a bit so they will stand up. Freeze for at least an hour.
  7. Remove the foil and repeat the yogurt and raspberry layering until you reach to top of the mold. Remember to freeze each layer for at least an hour before adding the next layer.
  8. Once completely filled, allow the pops to freeze solid.
  9. To remove the popsicles from the mold fill a bowl (or your sink) with hot water. Immerse your mold just up to the lip being very careful not to splash water on your pops. Hold the mold in the water for 30-60 seconds until you can slide them out.

Notes

Make a day or two in advance. Don't remove from the mold until ready to serve - the fruits will thaw quickly on a hot day.
Tried this recipe?

Let us know how it was!

Leave the first comment

Recipe Rating


This post may contain affiliate links, please see our privacy policy for details.

Hi, I'm Jessie. 

I’m a Los Angeles mama, home renovator, and lifelong creative, sharing the things that make everyday life a little more beautiful. I believe food is one of the best ways to bring people together, which is why I love cooking: it turns an ordinary Tuesday into something worth remembering. From recipes I make on repeat to DIY projects, home design, and a little bit of real life in between — welcome to my corner of the internet. I’m so glad you’re here.

More about Jessie

Let’s be friends!

Be the first to receive exclusive content, hear about upcoming collaborations, and special events!

* indicates required

Intuit Mailchimp