
Building Block Lunch Box
Whatttttttt!? Portable building block lunch boxes! Comeeeeeee on!
How cool is this?
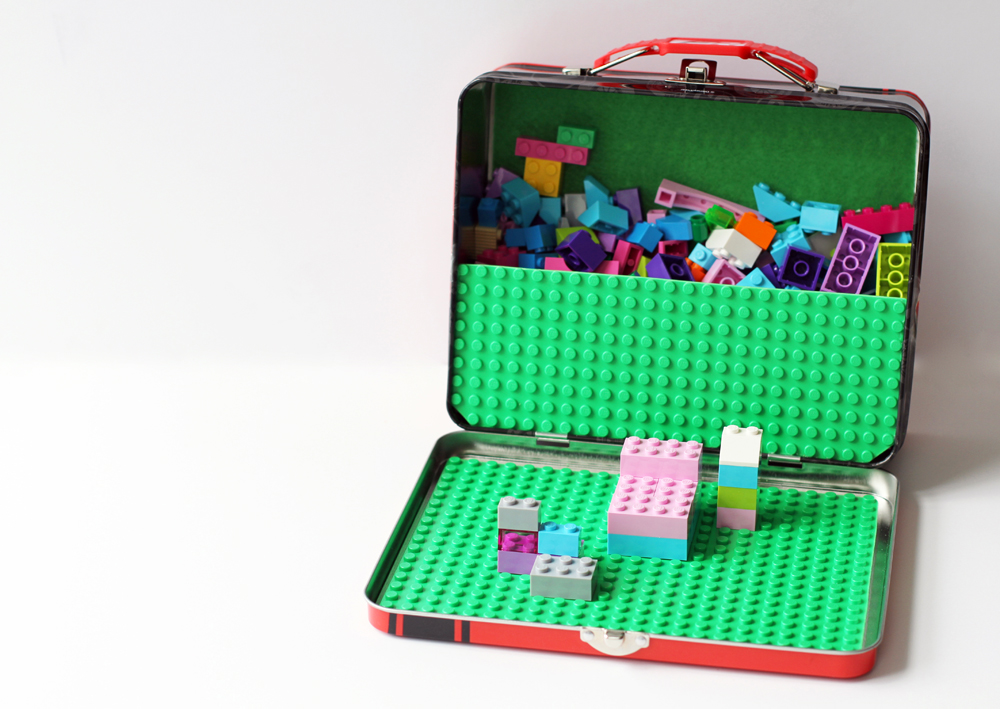
If your child loves building blocks or Legos you can make one of these super fun boxes and take your legos with you on the go. You can take this box to a restaurant. You can take this box on a plane or in the car. You can take it on a boat. You could take it on a goat. Take it in the rain. Take it in a train. Take it here or there. Take it anywhere!
Ok, I'm done. I love Dr. Seuss (in case you think I just lost my mind in the middle of that paragraph). Ok, but in all seriousness this portable building block box is awesome and the mounted base board makes it super easy to build your creation. When you're all done you can fold it right up. Easy peasy. I love this project. AND SO WILL YOU.


Portable Building Block Lunch Box
What you need
1 metal lunch box (Hobby Lobby $6.99)
1 LEGO Classic Green base plate (Toys R Us $7.99)
1 package Scotch Removable Mounting Squares (Hobby Lobby $3.99)
1 piece soft felt (craft store $.39)
Tacky glue
E6000 adhesive
Directions
1. Measure the inside lid of the lunch box. Trim the base plate to about ¼" smaller than that measurement. This will allow the box to close. Make sure to test fit before securing!
2. Attach 9 tape squares to the bottom of the base plate and press onto the lid.
3. Trim a piece of felt to fit the bottom of the lunch box. This will help reduce the sound of the building blocks moving in the metal box. Attach with tacky glue and let dry.
4. Using the remaining base plate, trim a piece to fit inside the lip of the lunch box base. You want to cover about half of the opening to make a little retaining wall for the building blocks. Attach with E6000, holding the piece in place until the glue sets.
5. Allow everything to dry completely before filling with building blocks!