Create custom illuminated marquee signs using cardboard letters and globe light bulbs.
DIY Marquee Letters

by Jessie Daye
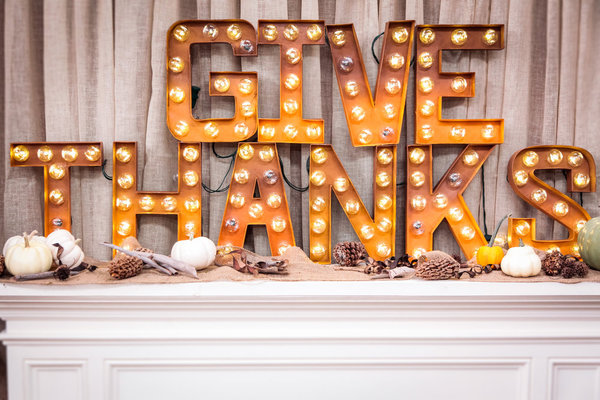
DIY Marquee Letters
What you need
- 12" cardboard 3D letters
- Strings of large round globe light bulbs
- Spray paint (dark brown, medium brown, orange, or color of choice)
- Exact-o knife
- Box cutter
Directions
- Using a box cutter, cut the front piece of cardboard off your letters so that they are set back and hollow.
- Using an exact-o knife cut about ten small holes in the back of your letters so they are evenly spaced apart. Keep holes small - large enough for the light bulb base to fit through but small enough so the screw base does not.
- After cutting holes, spray paint your letters your chosen color.
- Once paint dries, unscrew light bulbs from your strings of lights. One at a time, push the base attached to the string of lights up against the back of your letters and screw the bulbs back in from the front through the holes. Tip: For an ombre effect, use multiple shades of spray paint on the same letters.
Tried this project?
Let us know how it was!This post may contain affiliate links, please see our privacy policy for details.

Hi, I'm Jessie.
Mama to three girls and a lifelong creative who loves making everyday moments feel a little more special. Here, I share whimsical recipes, holiday inspiration, and creative projects designed to bring a little more joy to your day. I hope to inspire you to get creative, celebrate the little things, and make something beautiful. Welcome!
Let’s be friends!
Be the first to receive exclusive content and hear about my upcoming BOOK!