A budget-friendly tutorial for making decorative princess crowns using glitter paper and crepe paper for under $2 each.
DIY Princess Crowns

by Jessie Daye
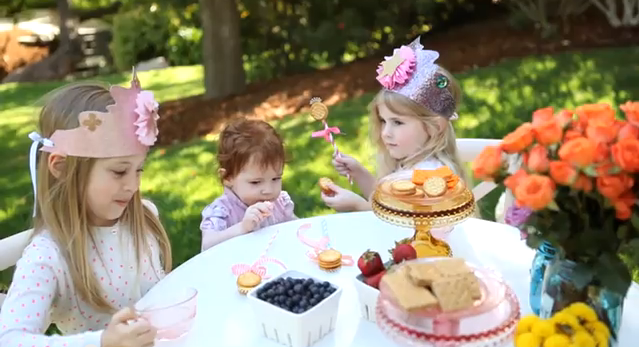
DIY Princess Glitter Crown
What you need
- 12" x 12" sheet of Glitter Paper
- Crepe Paper
- Ribbon
- Glue Gun
- Scissors
- Pencil
- Hole Punch
- Optional: Fancy craft store hole punch, glitter numbers or letters, pre-made glitter stars
Directions
- Download and print the free Princess Glitter Crown template on 8.5" x 11" paper. Trace the template onto the white back side of glitter paper, extending the sides as shown. You will get 2 crowns per sheet.
- Create the pinwheel: Take crepe paper and fold it into 1" wide folds back and forth like a fan until you have about 2" thick accordion. Cut off the excess paper.
- Bring the pinwheel ends together and glue them together.
- Hot glue the pinwheel to the middle of the crown. The middle should still be loose - this is normal.
- Optional: Add decorative elements like fancy hole punch designs, glitter stars, or glitter numbers/letters to the center of the crown.
- Hole punch both ends of the crown, making sure holes are not too close to the edges.
- String ribbon through the holes and hot glue the ribbon ends together instead of tying a knot for a more secure and polished look.
Tried this project?
Let us know how it was!This post may contain affiliate links, please see our privacy policy for details.

Hi, I'm Jessie.
I’m a Los Angeles mama, home renovator, and lifelong creative, sharing the things that make everyday life a little more beautiful. I believe food is one of the best ways to bring people together, which is why I love cooking: it turns an ordinary Tuesday into something worth remembering. From recipes I make on repeat to DIY projects, home design, and a little bit of real life in between — welcome to my corner of the internet. I’m so glad you’re here.
Let’s be friends!
Be the first to receive exclusive content, hear about upcoming collaborations, and special events!