How to Make Colored Mason Jars
I've said it before and I'll say it again ... I am obsessed with the mason jar! Mason jars just make me happy. I use these bad boys for everything. My friends think I need mason jar therapy. Anyone else need a mason jar intervention?
Well, well my beautiful friends, little did I know but you can now color your own mason jars! Yes, without glass paint might I add : ) Ok, so this is super easy and they look so pretty. I even made these jars on the Home and Family show on Hallmark!
Alright, follow my instructions below.

These are my Moroccan colored mason jars. I used the same process as I am about to explain below and then when they were all dry we applied gold puffy paint and stick on gems to the outside of the jars.
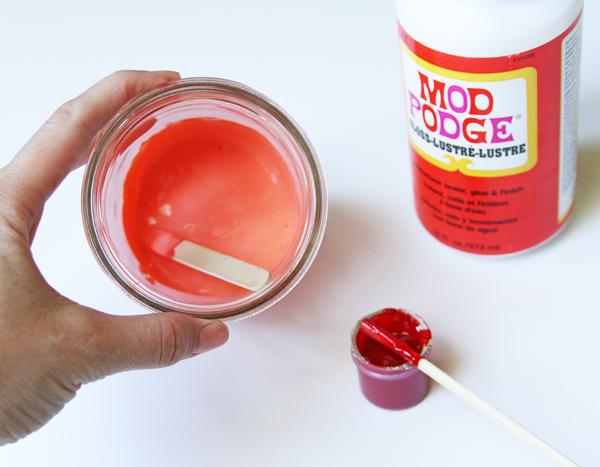
Grab whatever mason jar you want to color and pour in Mod Podge. If you have a large mason jar you will need about an inch and a half of Mod Podge. Next add a couple drops of food coloring or food coloring gels. Now the color is going to look pastel because it's mixed with the white glue but it will end up drying just like the food coloring you chose.

Use a stick (or whatever you have) to mix up the color. Be sure to mix everything very well so all the food coloring is incorporated. Any speckles of color will show up on your mason jar when it's dry.

Now using your hand tilt the jar every which way until all the glue covers the entire inside of the mason jar. Just roll it in your hands (being careful not to have the glue pour out of the jar) - Don't use a paint brush or stick to spread the color around because it will leave marks. Sorry - didn't get a picture of doing this with the orange color which is why I'm showing you the purple one.

Now place the jar on a paper plate so any excess glue pours out. If you have a tun of excess you can let it drip into another jar, but there shouldn't be that much left in the jar. (Tip: If doing multiple jars just mix a whole bunch of Mod Podge and food coloring in a bowl and pour into each mason jar.) After the excess drips out (about an hour) Flip the mason jar over and let it dry. Depending on how warm your house is this could take 24-48 hours.

See the purple mason jar? The bottom of the jar is still pastel purple in the creases. This is because it's not yet completely dry. As the jar dries all the glue turns clear. I tried putting one of my jars in the oven but it made lots of super small bubbles all over the jar and it didn't look very good so I recommend just letting it air dry. Be patient : )

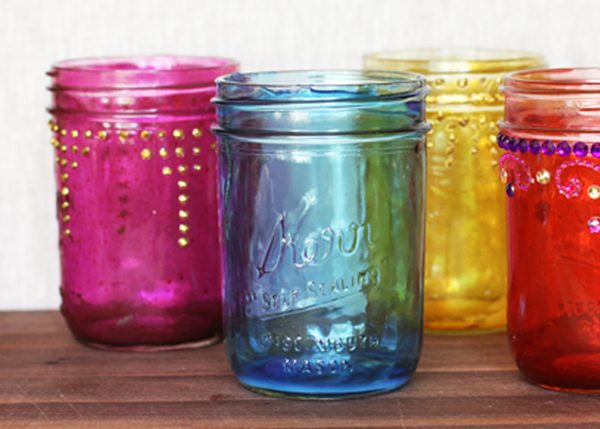
The finished product!
Now keep in mind these were made with glue so you cannot eat out of these or put food in them. These are for decoration only. Use it as a pencil holder or put a votive inside. Oh, and .... if you screw up and your jar doesn't look so hot when it dries you can peal off the glue and re-use the jar again. Happy crafting mason jar lovers. XO
*** Hi Ya'll. So we transferred our blog to another platform on 1/22/18 and we lost all our comments : ( Thousands of comments : ( I have posted many of them below for this tutorial in case they answered any of your questions! And If you have questions NOW I will get alerted when you ask them and I can answer you! Thank you!